This is it, folks! The inaugural craft post!!
And by folks I mean “nobody,” because I literally have no audience yet. Nobody is aware that I created this blog. Because right now this project is too chaotic for anyone to even know about it.
Anyway, I got into bullet journaling sometime last year during one of my creative bursts. I liked it a lot for a while, and it really helped me stay organized, but when I got busy and ran out of pre-drawn pages I mostly got out of the habit of using it. I’ve been wanting to pick it back up because there are aspects of it I really love, but I couldn’t bring myself to spend hours drawing grids in a notebook. I have better things to do!! Like play video games and be unemployed.
SO, eventually, I had an idea. What if I take the tedium out of it, and just keep the fun parts? I settled on a solution: print out boring, plain calendar pages, decorate them the way I would in my bullet journal, and then hang them on my fridge so they are very easy to see!!!
Because, y’all, part of my chaos is that I painstakingly create calendars and then never use or look at them again. We don’t want to enable that shit by having them inside a book I have to first locate and then open.
I don’t really have any process pictures, because, well…. chaos. But here’s what one of the pages looked like when I started:

Aaaand here’s what it looked like when I was finished!
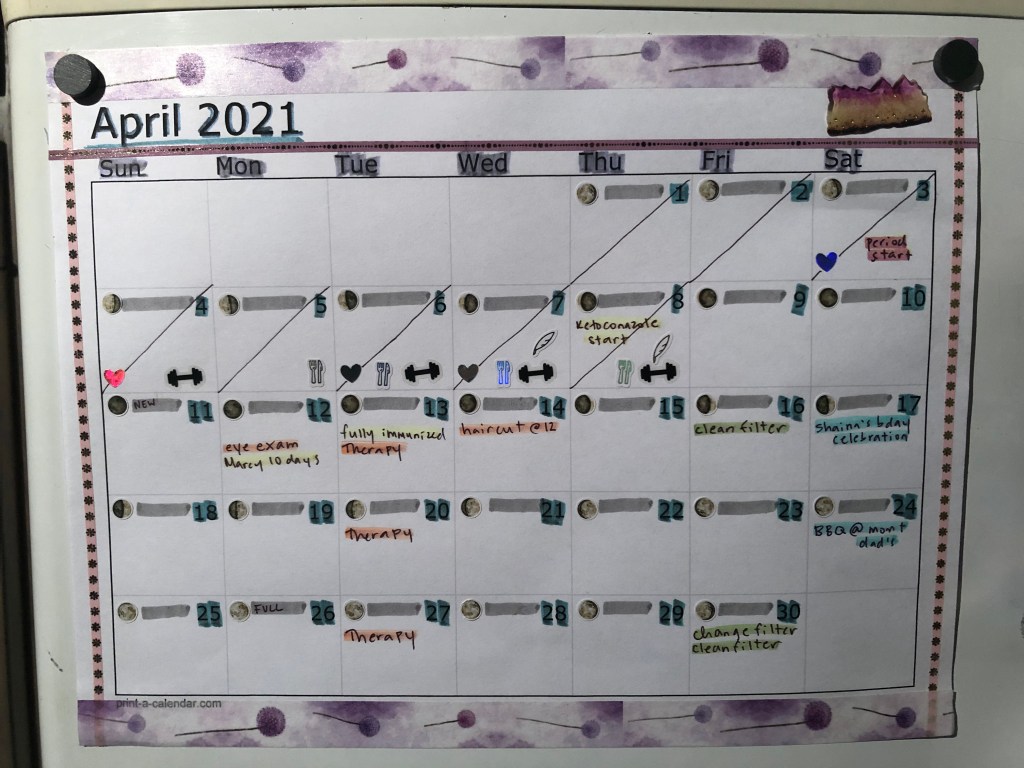
It’s far from perfect, but I’m happy with it: it’s functional, and it looks a lot more fun to engage with than what I started with. Because I am a child, if something looks boring I won’t use it, so decorating it was literally an incentive to get me to use it.
I used washi tape that I had from when I was bullet journaling for the borders, and the colorful markers are Meililiner Coarse and Fine Dual Purpose highlighters, which I have gleaned are the sort of gold standard for bullet journaling.

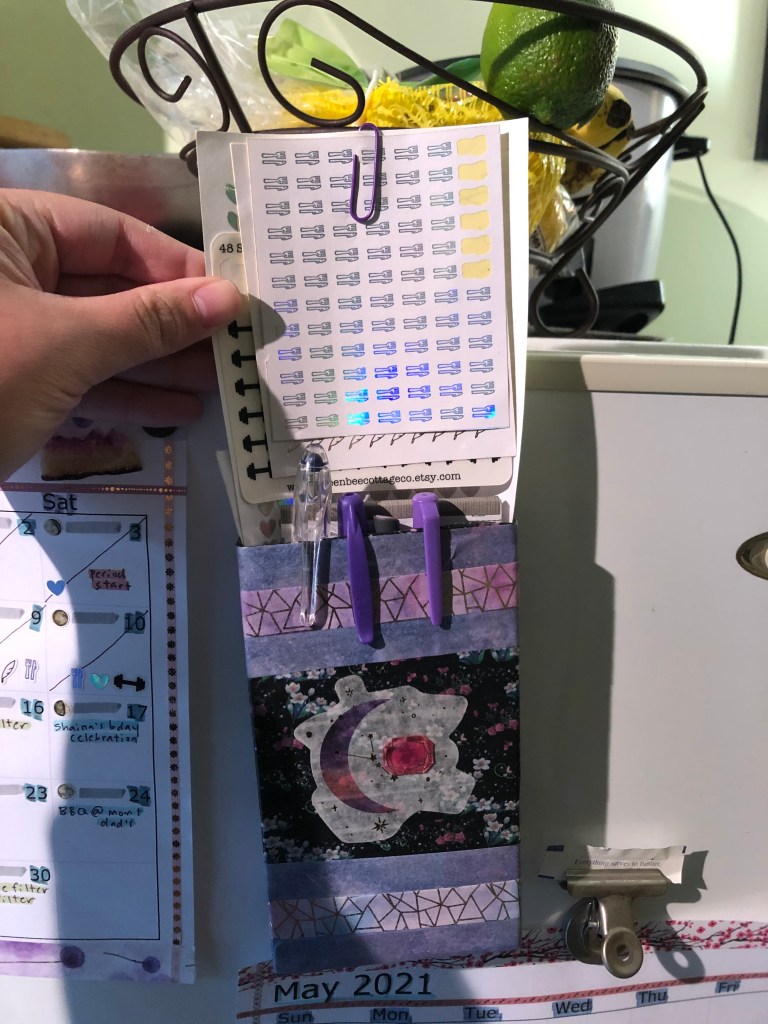
You may also have noticed that I have a number of stickers that I use on my calendars. I am a bit of a mystical, esoteric bitch so I like to know what the moon is up to, hence the moon phase stickers. Sometimes I try to ~align myself~ with the moon phases. More often I lose track, and when I realize it’s a full moon I’m like “oh, lit.” The particular moon phase stickers I used are from SymposiPress on Etsy, and you can find them here.
I also use my calendar for habit tracking, and I have a number of stickers that I use for that. Once again, I am a child, and the stickers help incentivize me to do things that are good for me. I get a barbell sticker (queenbeecottageco on Etsy) any day I hike or exercise in any other way; I get a fork and knife sticker (Paper and Prints AU on Etsy) when I stick to my eating intentions; and I get a little quill (also Paper and Prints AU) when I spent some time that day writing/working on my YouTube channel. The little holographic hearts (pastelspell on Etsy) are not for a habit per se–they represent any day/part of a day that I spent with my partner Cris. I keep track of that because I like to see if being with him affects whether or not I keep up with my other habits. It’s a mixed bag–we love to hike together, but I am more tempted to eat greasy and sugary foods when I’m with him!! I’m workin’ on it.
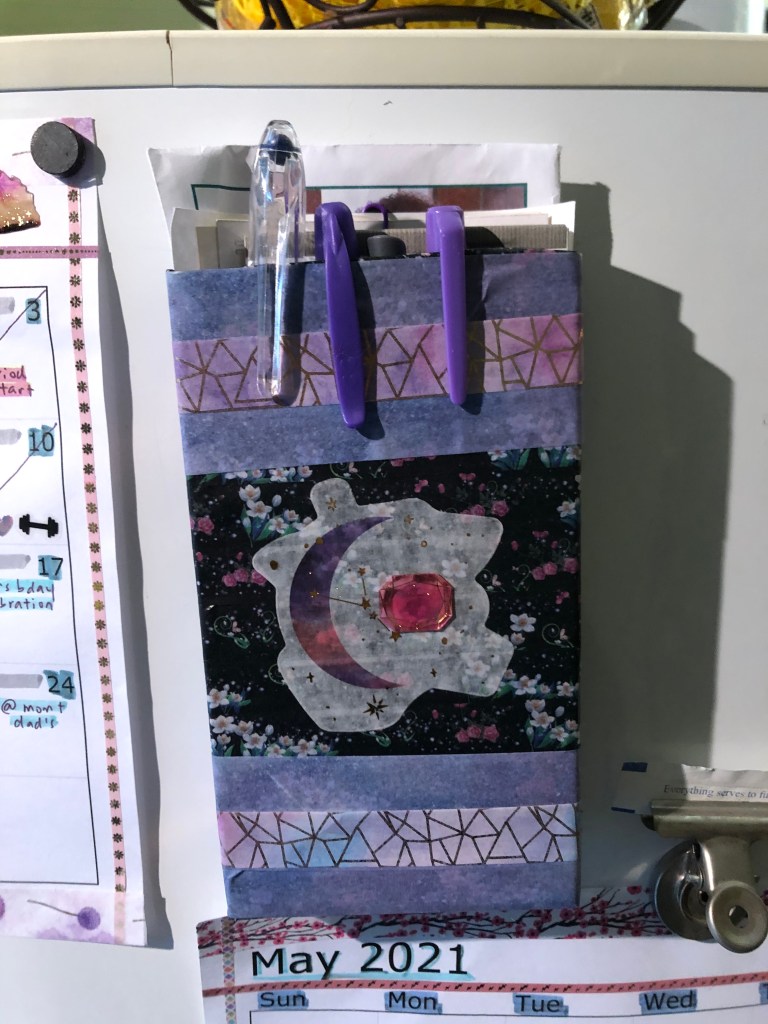
I keep my stickers in a little magnetic thing-holder I DIY’d a couple weeks ago, which is also stuck to my fridge–along with some pens and other assorted stuff I like to keep handy but don’t want my cats knocking off the counters. It’s made out of an empty Sweet Tarts box, washi tape, and a couple magnets.
Finally, the epoxy crystal sticker I used in the corner is from a gorgeous set by StickersKingdom on Etsy, which you can check out here.
Here’s what my fridge looks like now! I made and hung up the May calendar too, so I can plan a bit ahead.

Because I am me (i.e., prissy diva) I was unsatisfied with the magnet situation. ALL corners must be affixed. And simple ugly magnets WILL NOT DO.
And actually, it turns out I don’t really have fridge magnets. An oversight on my part!
So I got to thinking, and I decided to make myself some crystal magnets. As I have mentioned, I’m a bit of a crystal bitch, so this was the obvious choice. It wasn’t an original idea–you can buy them on Etsy–but I crunched some numbers (read: did basic arithmetic) and realized it would be cheaper and quicker to just make some myself.
So I ordered some tiny magnets on the Site That Will Not Be Named (you know the one, huge mega-corporation that abuses its workers but also hooray for two-day shipping) and popped over to a local metaphysical store to buy some little crystals. I stuck to the ones that were a dollar each to keep the project cheap.

I already had some adhesive on hand from a previous project (or two, the stuff comes in handy), and I used a toothpick to apply it to the magnets.
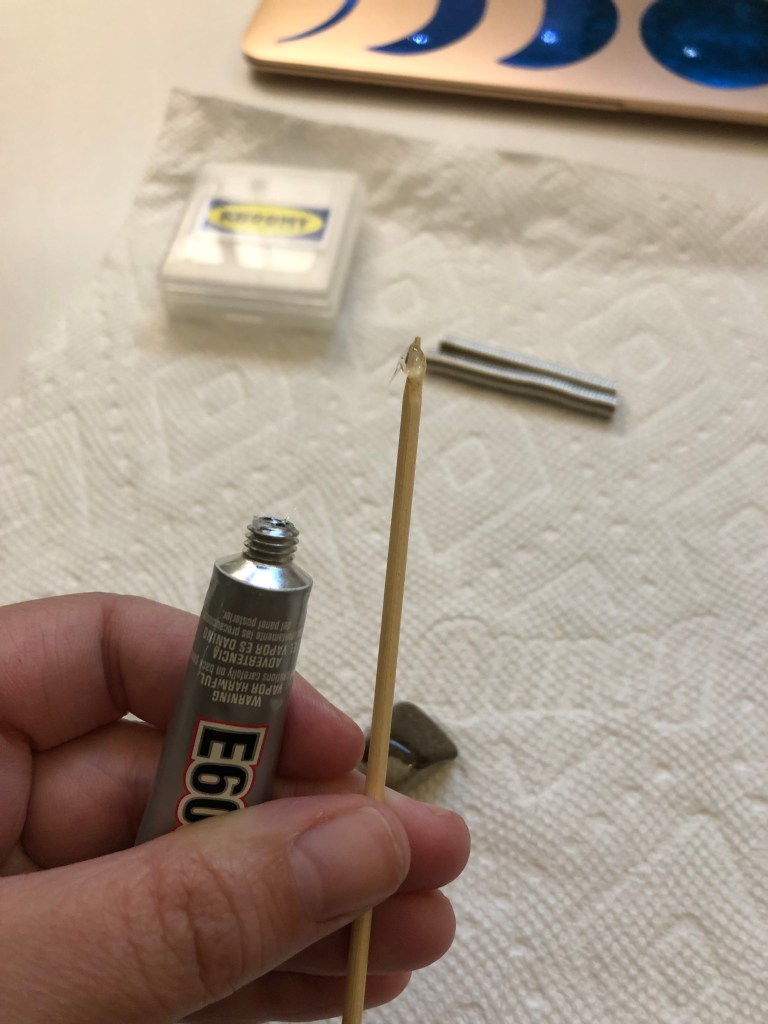
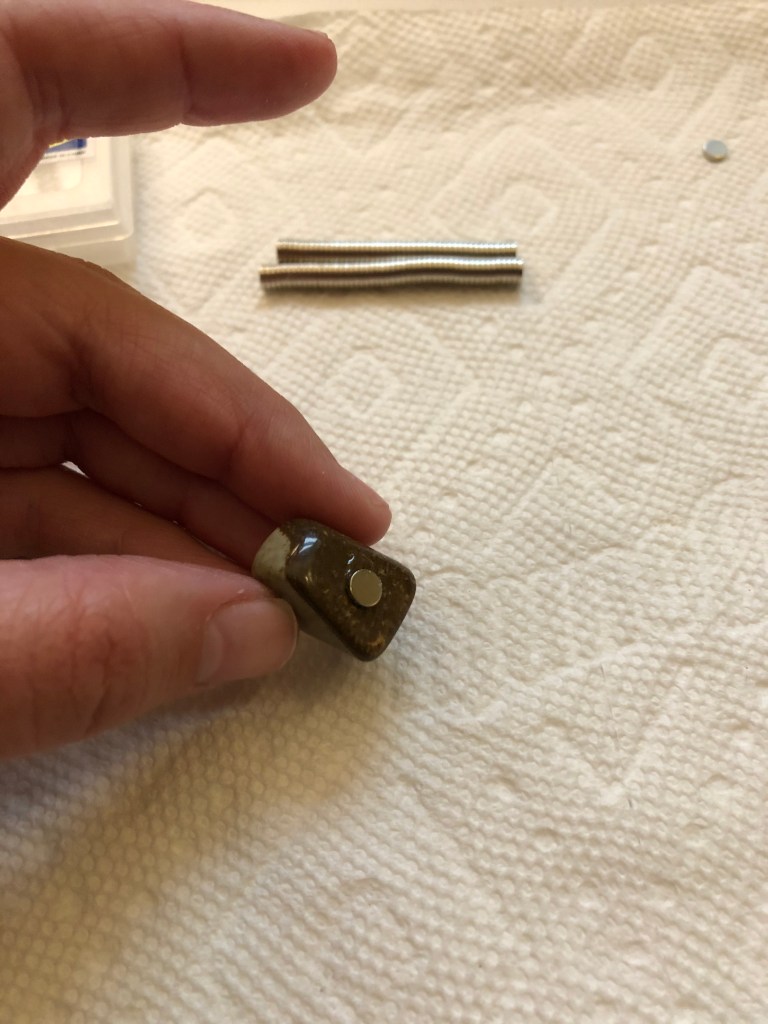
A few minutes later, I was done! I’ve gotta let them cure 24 hours, and then they’ll be ready to pop on the fridge.
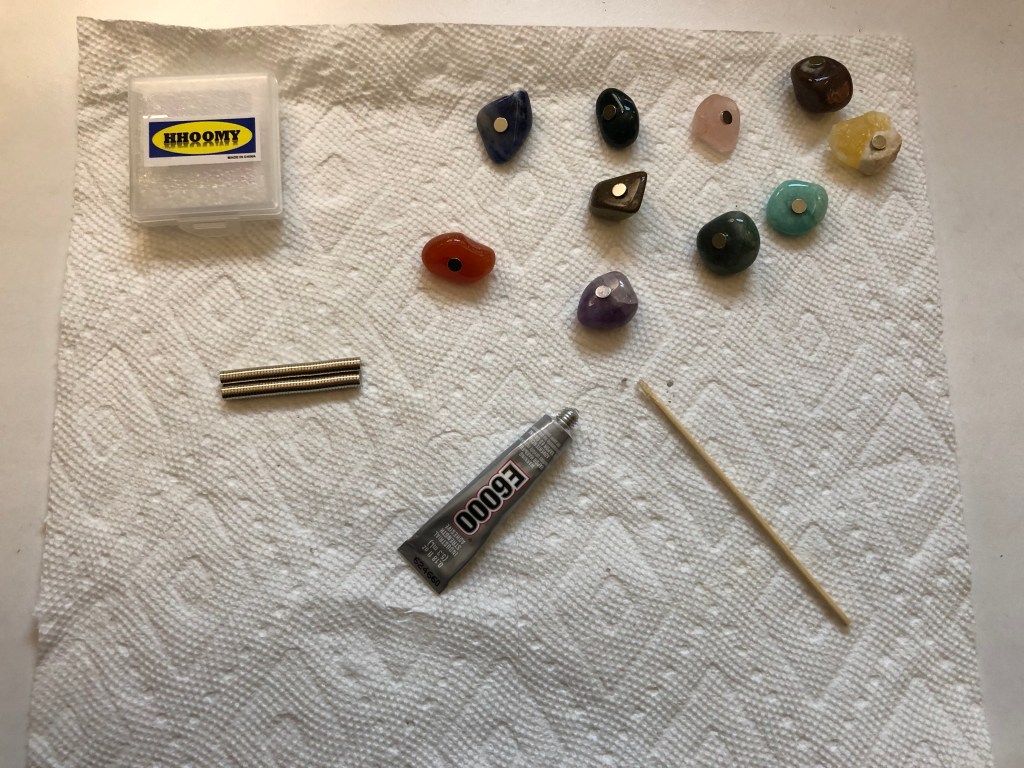
Altogether–not counting the supplies I already had–I spent $17 on this project. I also have a shit ton of tiny magnets left over, so I can make other stuff! I’m not sure how long it all took because I was in a Crafting Trance, but I’d estimate in the realm of two and a half hours, maybe less.
Update forthcoming when the magnets are done curing so you can see the final product!
